Oven cleaning mistakes guide Heath Street Hampstead

If your oven has gone from "a bit grubby" to "why does the kitchen smell like that?", you are not alone. This Oven cleaning mistakes guide Heath Street Hampstead is here to help you avoid the easy missteps that turn a routine clean into scratched enamel, stubborn grease, or a smoky disaster the next time you switch it on. Around Heath Street and wider Hampstead, many households want a practical clean that works fast but still protects the appliance. Fair enough.
In this guide, you will learn what oven cleaning mistakes people make most often, why they matter, how proper cleaning works, and when it makes sense to bring in a specialist. There is also a step-by-step method, a realistic comparison table, a checklist, and answers to the questions people actually ask when they are standing in front of a dirty oven with a sponge in one hand and doubt in the other.
Why Oven cleaning mistakes guide Heath Street Hampstead Matters
Oven cleaning looks simple until you actually do it. A bit of grease on the glass, some burnt-on residue on the tray, maybe a sticky patch on the door seal. Then you start scrubbing harder, the coating dulls, and suddenly the job is worse than when you began. That is why a practical guide matters: it saves time, reduces avoidable damage, and helps you keep the oven hygienic without turning the kitchen into a chemistry experiment.
For homes near Heath Street in Hampstead, the context is often a mix of busy routines, compact kitchens, and expensive appliances that deserve a careful touch. Many people are balancing work, family, or a move-out deadline, and the temptation is to rush. Truth be told, rushing is where most oven cleaning mistakes start.
A good guide also matters because the wrong approach can spread grime instead of removing it. Grease can smear into hinges, cleaning liquid can pool under seals, and abrasive pads can leave permanent marks on glass or enamel. If you have ever opened the oven the next day and noticed a burnt chemical smell, you already know what we mean.
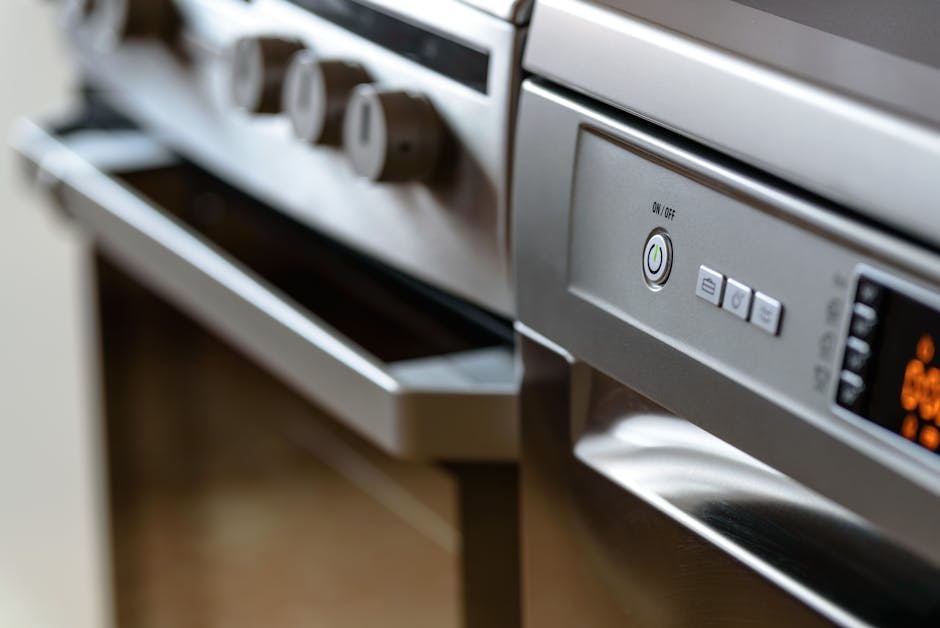
The basic idea is simple: clean in a way that removes contamination, protects finishes, and keeps the appliance safe to use. That sounds obvious, but the detail is where the win happens. Small decisions matter, especially with modern ovens that include catalytic liners, pyrolytic functions, fan elements, or delicate control panels.
How Oven cleaning mistakes guide Heath Street Hampstead Works
At its core, oven cleaning works by loosening grease, lifting carbonised residue, and wiping away debris without forcing it deeper into the appliance. You normally move through three stages: preparation, cleaning, and finishing. Miss any one of those and the result tends to wobble a bit.
Preparation means letting the oven cool fully, removing racks and trays, and checking the manufacturer guidance if you have it. This is the stage many people skip because they want visible progress immediately. But if the surface is hot, steam and cleaner can react badly, and that is asking for streaking, fumes, or a patchy finish.
Cleaning itself depends on the oven type and how heavy the build-up is. Light grease can often be handled with warm water, a non-abrasive cloth, and a suitable degreasing product. Heavier build-up may require a soaking method or a more detailed clean around the racks, fan cover, and door glass. The point is not brute force. It is controlled removal.
Finishing means wiping away residue, drying the parts properly, and checking for missed areas around seals, corners, and handles. This last step is often rushed, which is a shame because it makes the difference between an oven that just looks clean and one that is actually clean. You will notice the smell the next time it heats up, or rather, you should not notice one at all.
If you want a deeper, service-based approach to the job, it can help to compare the process with a specialist oven cleaning service or explore the more specific details on the oven cleaner page. Those pages are useful if you are deciding whether to clean it yourself or leave the heavy lifting to someone else.
Key Benefits and Practical Advantages
Getting oven cleaning right is not only about looks. Yes, a clean oven is nicer to use, but the practical benefits run deeper than that.
- Better cooking performance: Grease and burnt residue can affect heat distribution and airflow, so a clean oven tends to behave more predictably.
- Less smoke and smell: Built-up debris often burns off during use, which can create smoky bursts and unpleasant odours.
- Longer appliance life: Gentle, correct cleaning helps protect seals, fans, glass, and enamel from unnecessary wear.
- Improved hygiene: Old spillages and food residue are not something anyone wants lingering in a food-preparation appliance.
- Better presentation: This matters for end-of-tenancy, house moves, or simply keeping on top of a home that feels decent to live in.
There is also a quiet mental benefit. A clean oven reduces that nagging "I must sort that out one weekend" feeling. Small thing, maybe. But it adds up. In a busy Hampstead home, even small wins are welcome.
For broader home maintenance, some people pair oven care with a wider refresh such as deep cleaning or domestic cleaning. That can make sense if the kitchen, hob, and surrounding surfaces need a proper reset rather than a quick wipe.
Who This Is For and When It Makes Sense
This guide is for anyone who wants a cleaner oven without making a common mess of it. That includes homeowners, tenants preparing to leave a property, landlords checking a kitchen, and busy households that are tired of smoke every time they bake chips. It is also for people who have tried oven cleaning before and thought, "well, that didn't go as planned."
It makes particular sense if your oven has:
- stubborn grease on the door glass
- burnt-on food on the base or sides
- trays that never seem to come fully clean
- a lingering smell after heating
- visible residue near the fan or seals
It also makes sense before a special occasion, a property inspection, or after a long spell of heavy cooking. Christmas roasting, Sunday trays, late-night pizza, all of it leaves a mark. Let's face it, ovens do the work quietly and take the punishment silently.
If you are a tenant, check your tenancy obligations and condition requirements carefully before moving out. A lot of disputes come down to "cleaned" meaning different things to different people. If you want to align the kitchen with a broader move-out clean, an end of tenancy cleaning service can be a sensible companion to a standalone oven clean.
Step-by-Step Guidance
Here is the practical route. Keep it calm and do not skip around too much. A tidy sequence usually beats a frantic scrub.
- Turn the oven off and let it cool completely. Not lukewarm. Properly cool. This avoids steam, splashing, and avoidable irritation.
- Remove racks, trays, and loose accessories. Cleaning them separately gives you better access and prevents grime from hiding in corners.
- Brush out loose debris. Use a dry cloth or soft brush to remove crumbs and ash-like residue before adding liquid.
- Choose a suitable cleaner. Check that it is appropriate for your oven type and surface finish. If in doubt, start mild.
- Work from top to bottom. That way, loosened dirt falls onto areas you have not yet cleaned.
- Let the product dwell if needed. Do not attack burnt-on grease instantly. Give the cleaner time to break it down.
- Wipe rather than scour. Use a soft sponge or microfibre cloth. Repeat if necessary, but avoid abrasion.
- Clean the glass carefully. The door glass often shows the difference between a rushed job and a proper one.
- Check hinges, seals, and edges. These are the places people miss most often.
- Dry the surfaces fully before use. Residual moisture can cause odours or streaking once the oven heats up.
If the grime is baked on hard, repeat the process rather than escalating immediately to something harsh. That patience saves more ovens than elbow grease does.
Expert Tips for Better Results
Here are the details that usually separate an okay clean from a genuinely decent one.
- Use a non-abrasive cloth first. It sounds basic, but too many scratches begin with a "just this once" scouring pad.
- Test products on a small area. Especially if you are cleaning an older oven or a surface you have never treated before.
- Handle the door glass gently. The glass can look tougher than it is, and trapped grit under a pad can leave marks.
- Ventilate the kitchen. Open a window if possible. It helps with both fumes and the general wet-clean smell.
- Don't flood the cavity. Too much liquid can get into seals, electrics, or hidden edges.
- Clean after heavy cooking sessions. Fresh residue is easier to remove than a month-old crust that has set like concrete.
A small trick we see often: clean the oven after it has been used but while the residue is still relatively fresh, not stone cold and ancient. Sounds obvious, but people forget. Then they spend twice the time later.
If your wider home needs attention too, a good one-off cleaning visit can help reset everything at once, which is especially useful after a move, renovation, or a chaotic few weeks.
Common Mistakes to Avoid
This is the heart of the guide. Most oven cleaning problems come from a handful of repeat errors. If you avoid these, you are already ahead of the game.
| Mistake | What usually happens | Better approach |
|---|---|---|
| Cleaning a hot oven | Cleaner dries too quickly, fumes increase, and streaks appear | Let the oven cool fully before starting |
| Using abrasive pads | Scratches on glass, enamel, or coated surfaces | Use soft cloths and gentle pressure |
| Over-wetting the cavity | Liquid enters seals or pools in awkward places | Apply sparingly and wipe carefully |
| Ignoring racks and trays | Clean cavity, dirty accessories, poor overall result | Clean every removable part separately |
| Mixing random products | Unpredictable reactions, smells, or residue | Use one suitable cleaner at a time |
| Rushing the rinse and dry | Sticky residue, streaks, or a smoky first use | Wipe down thoroughly and let everything dry |
One mistake deserves special mention: cleaning around fan covers or seals as if they are just another smooth surface. They are not. They can trap dirt, and they can also be sensitive. A light touch wins here. Always.
Another common issue is trying to "fix" a bad result with a stronger cleaner. That is often how damage starts. If the first product is not cutting through it, slow down, reassess, and avoid the chemical arms race. No one needs that in a small kitchen at 9pm.
Tools, Resources and Recommendations
You do not need a van full of kit, but you do need the right basics. The aim is control, not clutter.
- microfibre cloths
- soft non-scratch sponges
- rubber gloves
- a small brush for crumbs and edges
- a suitable degreasing cleaner
- paper towels or dry cloths for finishing
- a bowl or sink space for soaking racks and trays
For residents comparing options, it can help to think about the level of grime and the time available. If you are short on time or the oven is heavily soiled, a professional visit can be more efficient than piecing together a DIY clean. The service pages for cleaners and a cleaning company may help you understand how broader cleaning support is structured.
If you are focused on appliance-only work, it is worth looking at oven cleaning options rather than assuming a general kitchen clean will cover the details. A kitchen wipe-down is useful, but it is not the same thing as a dedicated oven service.
For some homes, especially those with open-plan kitchens, a broader tidy-up can make the oven stand out less in a good way. In that case, pairing the oven with house cleaning or home cleaners may be the more efficient move.
Law, Compliance, Standards, or Best Practice
There is no need to overcomplicate this, but safety and best practice matter. In the UK, household cleaning should always be handled with sensible care around chemicals, ventilation, electrical parts, and food-contact surfaces. That means reading labels, not mixing products, and keeping cleaners away from children and pets while work is underway.
For rented homes, oven condition may matter at the end of a tenancy, but expectations vary depending on the agreement and the property's starting condition. It is sensible to document the state of the appliance if you are moving in or out. Photos are boring until they save a deposit conversation. Then they are very exciting.
From a practical standards point of view, the best practice is straightforward:
- follow manufacturer instructions where available
- use appropriate personal protective equipment, such as gloves
- avoid abrasive damage to food-contact surfaces
- ensure the oven is fully dry before use
- do not use methods that create unsafe fumes or residue
If a cleaner or cleaning company is carrying out the work, it is reasonable to expect professional conduct, sensible handling of products, and attention to safety. If you want to review service-related details, the pages on health and safety policy, insurance and safety, and terms and conditions are useful context. They do not replace common sense, of course, but they help frame expectations.
Options, Methods, or Comparison Table
Different ovens and different levels of grime call for different approaches. Here is a simple comparison to help you decide what is sensible.
| Method | Best for | Pros | Watch out for |
|---|---|---|---|
| Light DIY clean | Fresh grease, small spills, regular upkeep | Cheap, quick, easy to repeat | Easy to under-clean if you rush |
| Detailed DIY clean | Moderate build-up, trays, glass, seals | More thorough, still cost-effective | Takes time and some patience |
| Professional oven cleaning | Heavy grease, move-out cleans, busy households | More consistent results, less effort for you | Requires scheduling and budget |
For a lot of people, the middle option is fine most of the time. But if the oven has been ignored for months, or if the door glass is layered with residue that will not budge, a specialist is often the calmer choice. No drama. Just efficiency.
Case Study or Real-World Example
A fairly typical scenario: a family in Hampstead had a built-in oven that looked "not too bad" until they opened the door and saw the streaks, the burnt tray marks, and a bit of blackened residue near the fan cover. They started with a rough scrub and made the glass look cloudy. Then they stopped, thankfully, before going any further.
What went wrong? Three things. First, they cleaned before the oven had fully cooled. Second, they used a scouring pad on the door glass. Third, they tried to remove heavy residue in one pass instead of loosening it step by step. Nothing exotic. Just normal human rushing, which happens.
The better approach would have been to remove all parts, treat the racks separately, use a soft cloth with a suitable cleaner, and allow dwell time before wiping. In this kind of situation, a professional oven clean often saves time and avoids further damage. It can also restore the whole kitchen feeling, which is oddly satisfying on a grey afternoon when the kettle is on and the windows are slightly fogged.
The main lesson? The job is not about force. It is about sequence, patience, and not getting cheeky with abrasive tools.
Practical Checklist
Use this before you start. It keeps the job tidy and reduces the chance of silly mistakes.
- Oven switched off and fully cooled
- Kitchen ventilated if possible
- Racks, trays, and accessories removed
- Loose crumbs brushed out
- Appropriate cleaner chosen for the surface
- Soft cloths and non-scratch sponges ready
- Gloves on if using cleaning chemicals
- No mixing of products
- Residue wiped away thoroughly
- Door glass checked for streaks
- Seals, hinges, and edges inspected
- All parts dried before switching the oven back on
If you tick those boxes, you are already avoiding most of the usual errors. It is not glamorous, but it works.
Get a free quote today and see how much you can save.
Conclusion
The best way to clean an oven is not the most aggressive way. It is the methodical one. That means cooling the appliance properly, choosing the right cleaner, using soft tools, and paying attention to the spots that most people rush past. In Heath Street Hampstead and beyond, that simple approach can save you from scratched glass, lingering smells, and a lot of unnecessary effort.
If you only remember one thing, make it this: slow down at the beginning and the rest becomes easier. A careful clean usually leaves you with a better result and less regret. And that, honestly, is a nice feeling when the kitchen finally smells like nothing at all.
When you are ready to decide between DIY and a more thorough professional approach, it helps to compare the actual condition of the oven with the time and patience you have available. Sometimes the quickest route is the one that starts with a bit of honesty.
Frequently Asked Questions
What is the biggest mistake people make when cleaning an oven?
The biggest mistake is usually cleaning it while it is still hot, or using something too abrasive straight away. That combination can damage surfaces and make residue harder to remove.
Can I clean oven glass with a scouring pad?
It is better not to. Scouring pads can leave scratches or cloudy marks, especially if grit is trapped in the pad. A soft cloth or non-scratch sponge is safer.
How often should an oven be cleaned?
There is no one perfect schedule, but regular light cleaning is much easier than leaving grease to build up. Many people find that a small clean after messy cooking keeps the job manageable.
Is it safe to use a lot of cleaner inside the oven?
Not really. More is not always better. Too much liquid can get into seals or leave residue behind. A controlled amount, used properly, works better.
What should I clean first: the racks or the oven interior?
Remove the racks and trays first, then clean the cavity. That gives you better access and stops loose dirt from falling back onto parts you have already cleaned.
Why does my oven still smell after cleaning?
That often means some residue or cleaner has not been fully removed, or the appliance was switched on before everything dried. A final wipe and full dry usually solves it.
Are homemade cleaning mixtures always safe?
Not always. Some can be fine in the right context, but mixing products is risky and can create problems. If you are unsure, stick to one suitable cleaner and test it carefully.
When should I hire a professional oven cleaner?
It makes sense if the build-up is heavy, you are short on time, or you want a better result without risking damage. It can also be a sensible choice before a tenancy inspection.
Can a dirty oven affect cooking?
Yes, in practical terms it can. Heavy residue can smoke, smell, and sometimes affect how evenly the oven seems to perform. A clean oven is usually easier to trust.
What is the safest way to dry an oven after cleaning?
Use a clean dry cloth to remove visible moisture, then leave the door open for a while so the interior can air out fully before using it again.
Is oven cleaning part of a general house clean?
Sometimes, but not always in the depth people expect. A general clean may cover the kitchen surfaces, while a dedicated oven clean goes much deeper. If you want the appliance itself handled properly, a specific oven service is usually better.
Where can I find more help with related cleaning services?
If you are comparing options across the home, pages like carpet cleaning, window cleaning, and sofa cleaning can help you think through a wider cleaning plan without overcomplicating the process.